How does the Tempiro app work?
Via the Tempiro app, you can control our Smart Fuses and Smart Switches, set the desired temperature for your home and choose whether you want to activate hourly price control. Our solution makes your home smarter, more comfortable and more energy efficient.
Logging in
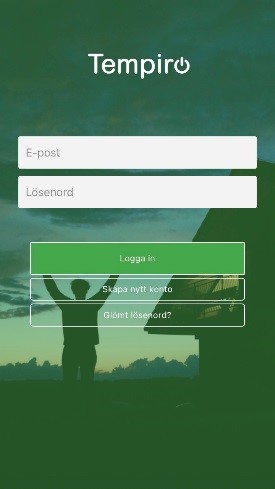
If you have created an account, log in with your email address and password.
If this is your first time using the app, select Create new account. You must have a Tempiro system with our central unit to register an account.
Select Forgot password if you don’t remember your password.
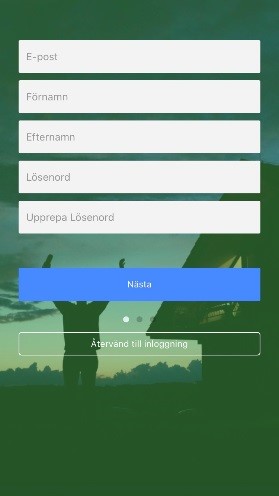
Create a new account
When registering a new account, enter a working email address, choose a password and enter the address of the residence where you are installing the system.
In the last part of the registration, enter the MAC ID on the back of your central unit. You should only enter the last 6 characters, which are a combination of numbers and letters a to f, for example 12a3b4.
Home
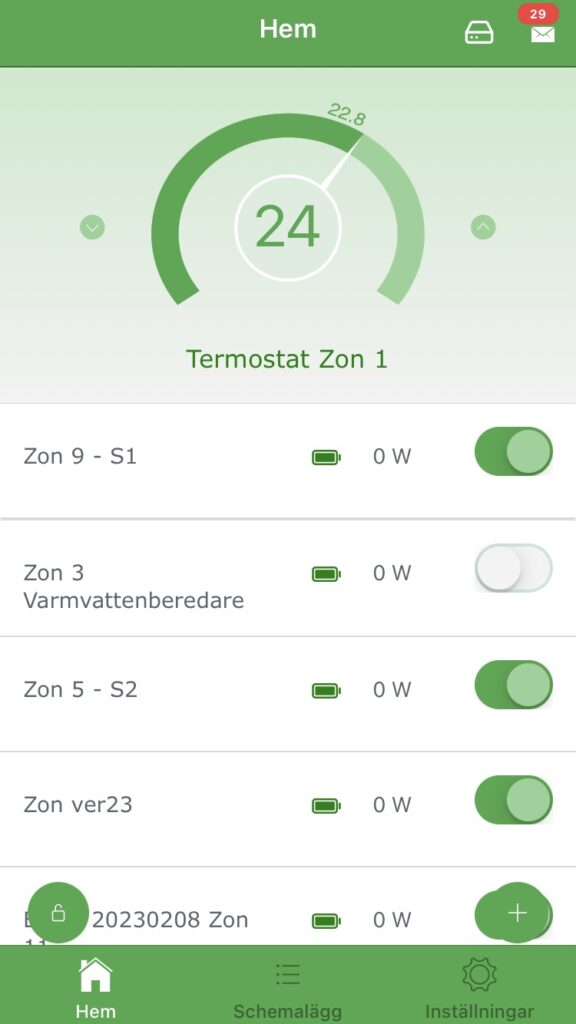
The Home view shows all the devices you have added to the app. When using the app for the first time, the view is empty and you add devices by tapping the plus symbol (+) in the lower right corner.
The padlock symbol in the lower left corner controls alarms. If you don’t have any alarm devices, set it to green and the alarm will be off.
Add units
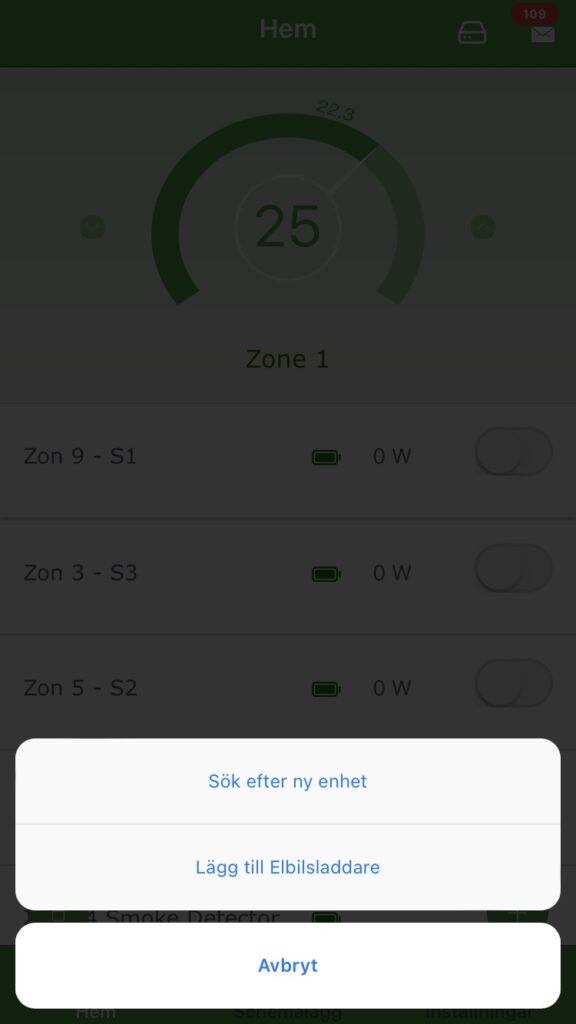
When you press the plus button, two options appear and you select Search for new device if you have not already added devices that control an EV charger.
Now the central unit starts searching for new devices. Now press the button on the device you want to add according to the instructions provided.
When the central unit finds a new device, it automatically stops the search. Otherwise, you can cancel the search.
Thermostat
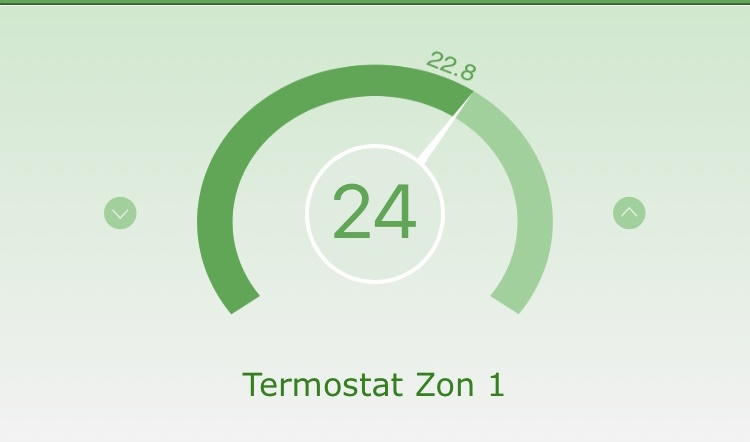
If you have added a thermostat, the set temperature is displayed in the center of the white circle and you raise and lower the desired temperature with the up and down arrows. The current measured temperature is displayed in smaller text outside the temperature display.
In the example, the temperature is set to 24 degrees and the current temperature is 22.8 degrees.
Click on the name of the thermostat to make more settings.
The thermostat displays the offline status if the system detects that there is no contact, for example if there are no messages from the thermostat to the system.
Set the thermostat
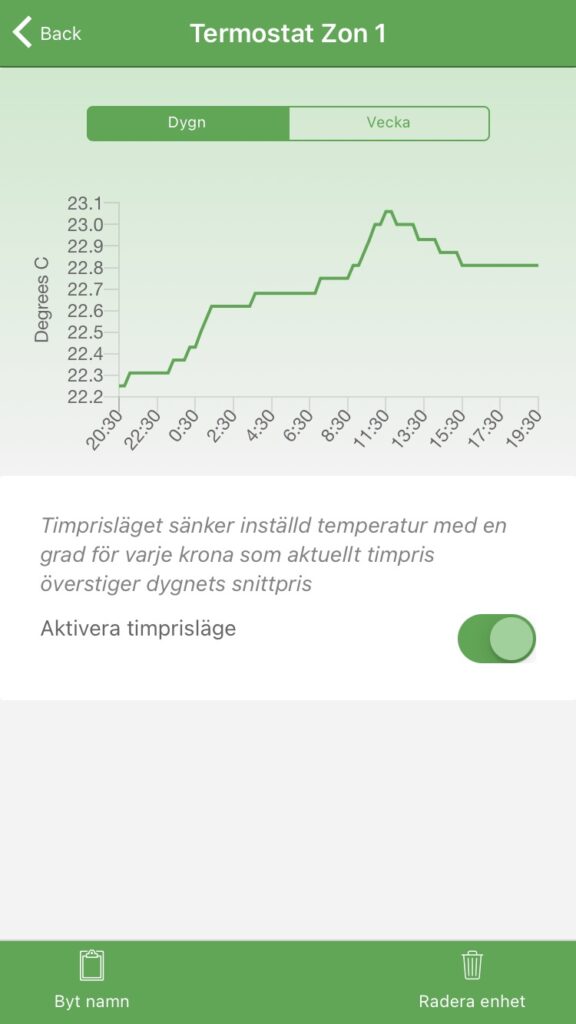
In the Home view, click on the name of a thermostat to make its settings.
Select Rename and give the thermostat a name so you don’t mix up different thermostats.
You can Enable hourly rate mode for a thermostat. It will then automatically reduce the set temperature by one degree for every krona that the hourly price is above the average for the current day.
If a thermostat or other device is not working properly or needs to be replaced, select Delete device to remove it from the app.
You can then reinstall it or install another replacement unit.
Fuses and switches
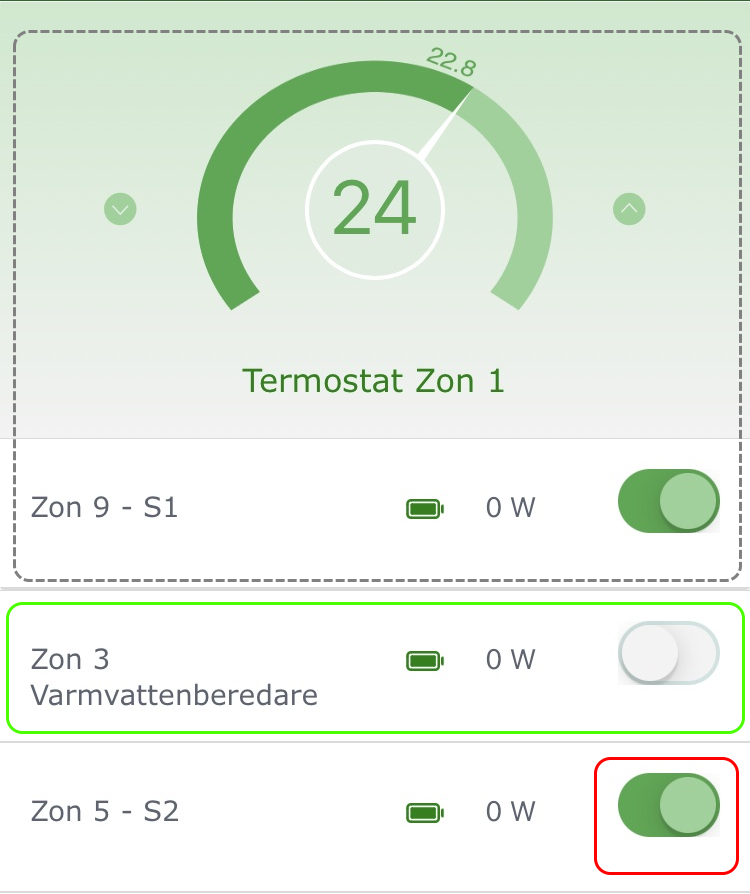
For each Smart Fuse, Switch or Smart Plug, a line is displayed in the Home view. The name of the device is displayed, followed by a battery indicator, a power value and an on/off switch.
Devices with batteries will indicate low battery with a red battery symbol. Then the device needs to be charged.
The power value shows the power in watts that the device has last measured. The value is updated when the device sends a new value, usually every 5-15 minutes.
Drag the slider to the right to turn on the power in the unit and the slider turns green.
Clicking the slider again turns off the power in the device and the slider turns gray.
If the command is not successful, the slider will return to the previous position.
Units controlled by a thermostat are grouped together with the thermostat, see gray mark in the picture.
Set Fuse and Breaker
Click on the device name, e.g. New Fuse for a new device, to change its settings.
You can now rename, select a control or delete the device.
Select Rename and give the device a name so you don’t mix up different fuses or switches.
Click Select control if the device is controlled by a thermostat or EV charger. Then select the name of e.g. the thermostat that will control this particular unit.
If the unit is not controlled by a thermostat or electric car charger, you can activate the hourly price mode instead.
Then you choose how many hours the device should be on per day. The system will select the cheapest hours and turn off the unit for the other hours.

Diagram
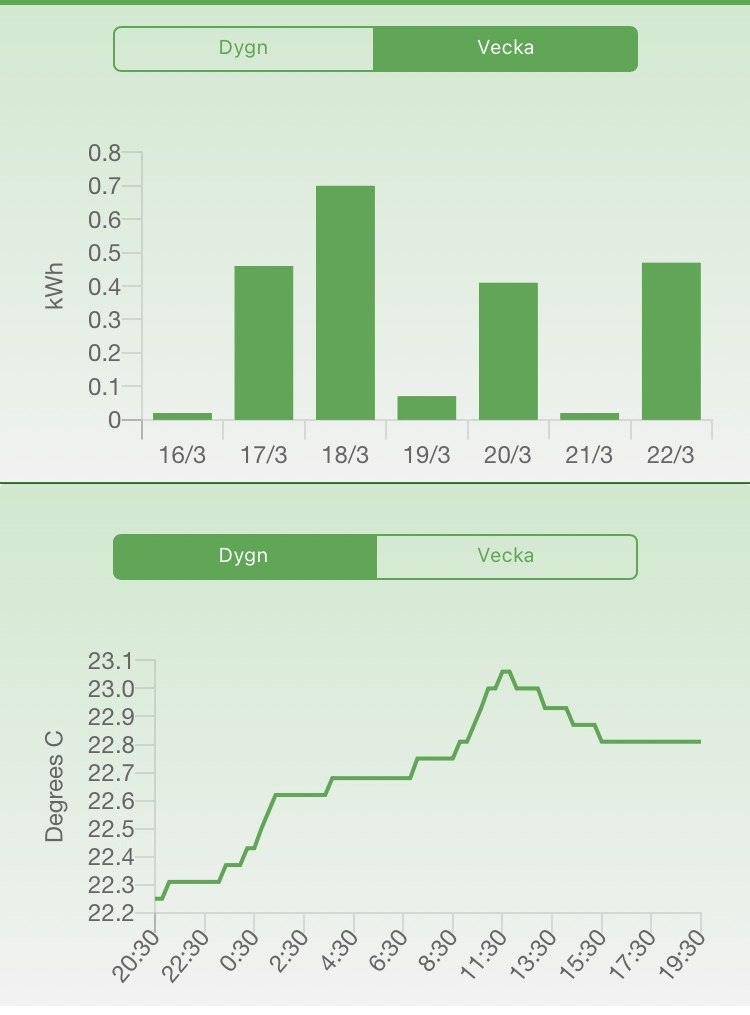
For the devices that measure energy, power and energy graphs are displayed.
If you select Day, a power curve in Watts is displayed.
If you select Week, energy consumption per day is displayed in kWh.
For thermostats, the measured temperature is displayed for Day.
If you select Week, the average temperature for the last week is displayed.
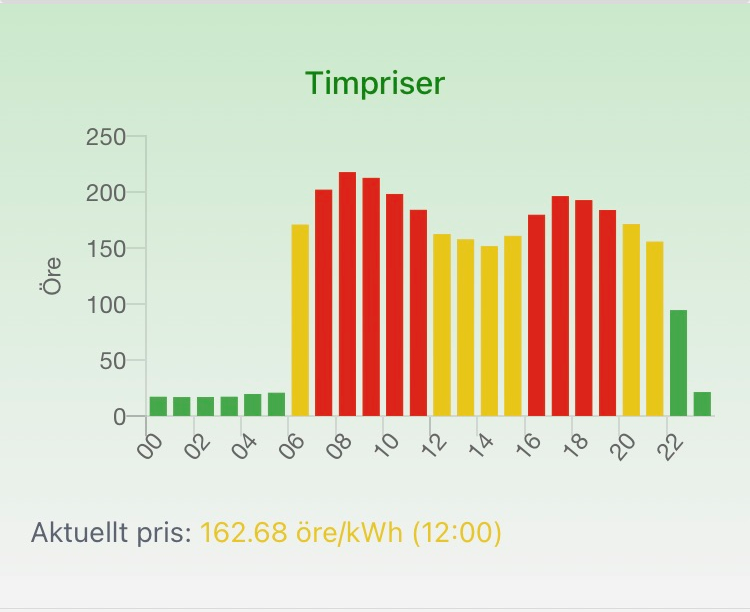
Hourly rates
At the bottom of the Home view, Hourly Rates are displayed with a graph for the 24 hours of the current day.
Tempiro obtains hourly prices from the official energy exchange Nordpool.
If you have an hourly rate contract, your electricity trading company will use the same hourly rates but will probably add a surcharge of a certain percentage or fixed amount. It is still the same hours that are most expensive or cheapest.
The hourly rates are different for the 4 price areas in Sweden: SE1 – SE4.
You can change the price range in the settings.

Scheme
Select Scheduling if you want a Thermostat to change temperature at a specific time, only once, or regularly every day or week.
You can also schedule when a Fuse, Switch or Smart Plug should be turned on or off, but it should not be controlled by a thermostat or hourly rate control.
Press + in the top right corner to create a new schedule.
Days with scheduled events are shown with a green date number. Click on the day to see the scheduled handshakes.
To view the details of a programmed event, click on the green wheel to the right of the event.
If you want to delete an event, you can do so via the red bin.
You can schedule as many events as you want.
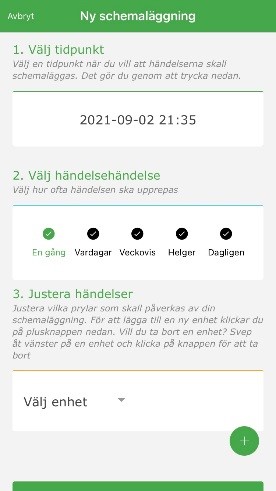
New scheduling
Select the day and time to schedule the event.
You can choose that the event occurs only once, every Weekday, once a Week, every Holiday or Daily.
For a thermostat, select the desired temperature.
For example, if you want to have 22 degrees during the day and 20 degrees at night, you can schedule 22 degrees daily at 07:00 and 20 degrees daily at 22:00. Then the temperature is kept at 20 degrees between 22:00 and 07:00, and the rest of the time at 22 degrees.
For other devices to be turned on or off, use the “on/off” button on the same line as the selected device.
Save the event and you will see the event in the calendar.
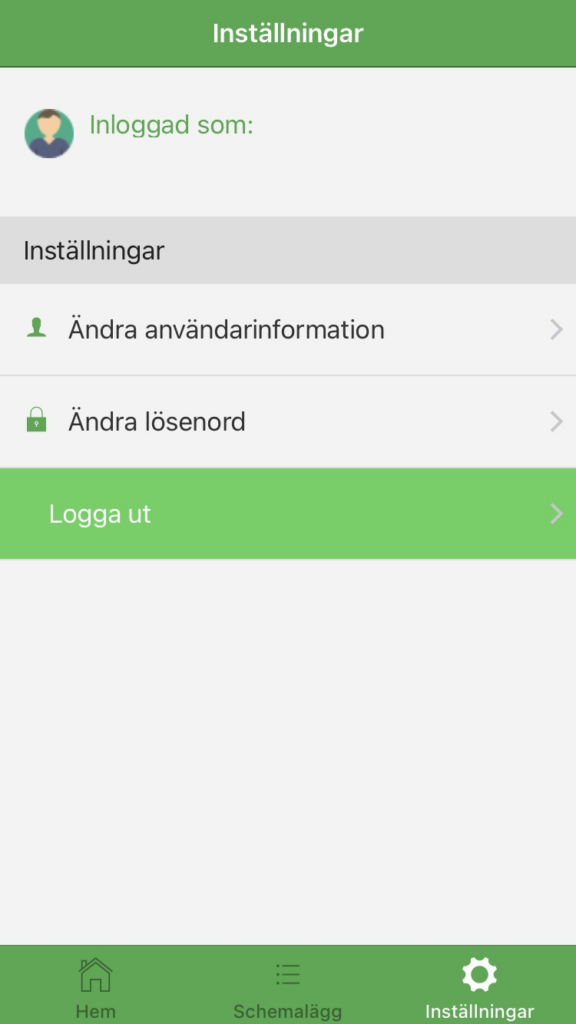
Settings
To change your password and change the address where the system is installed, select Settings and then either Change Password or Change User Information. The user information affects which electricity area is used for hourly prices.
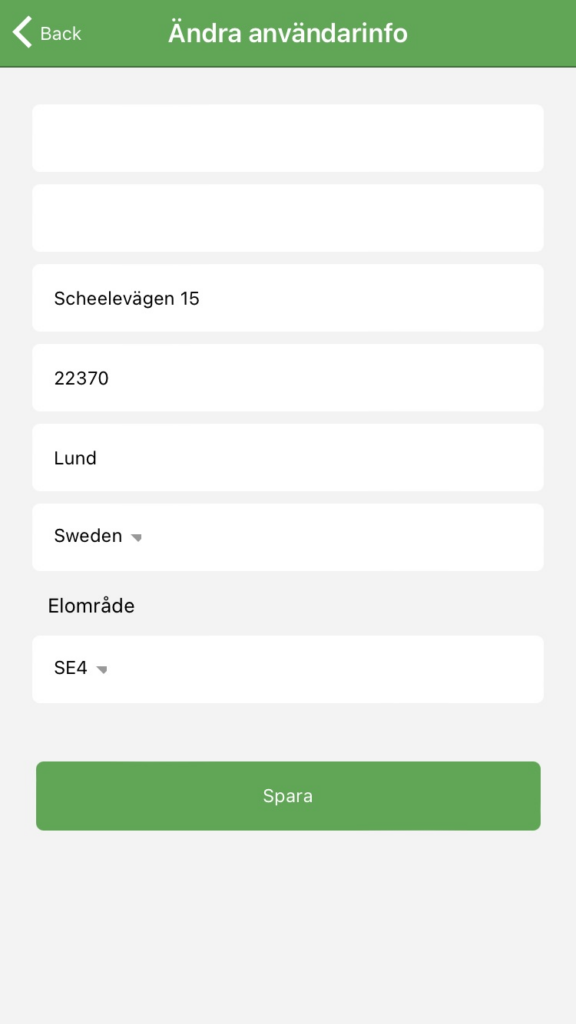
User information
It is good to enter the correct address where the system is installed and also check that the correct electricity area is selected for hourly rates. You can compare electricity areas with your electricity bill.
The address also controls the weather information that Tempiro uses to display the outside temperature on the Home View.